Table Assembly
Table Base Only (Knock-Down)

STEPS
1. Place the table base and carton on a flat surface, open top of carton and fold back, use carton for pad to prevent scratching.
Note: Assembly parts located in bag with parts.
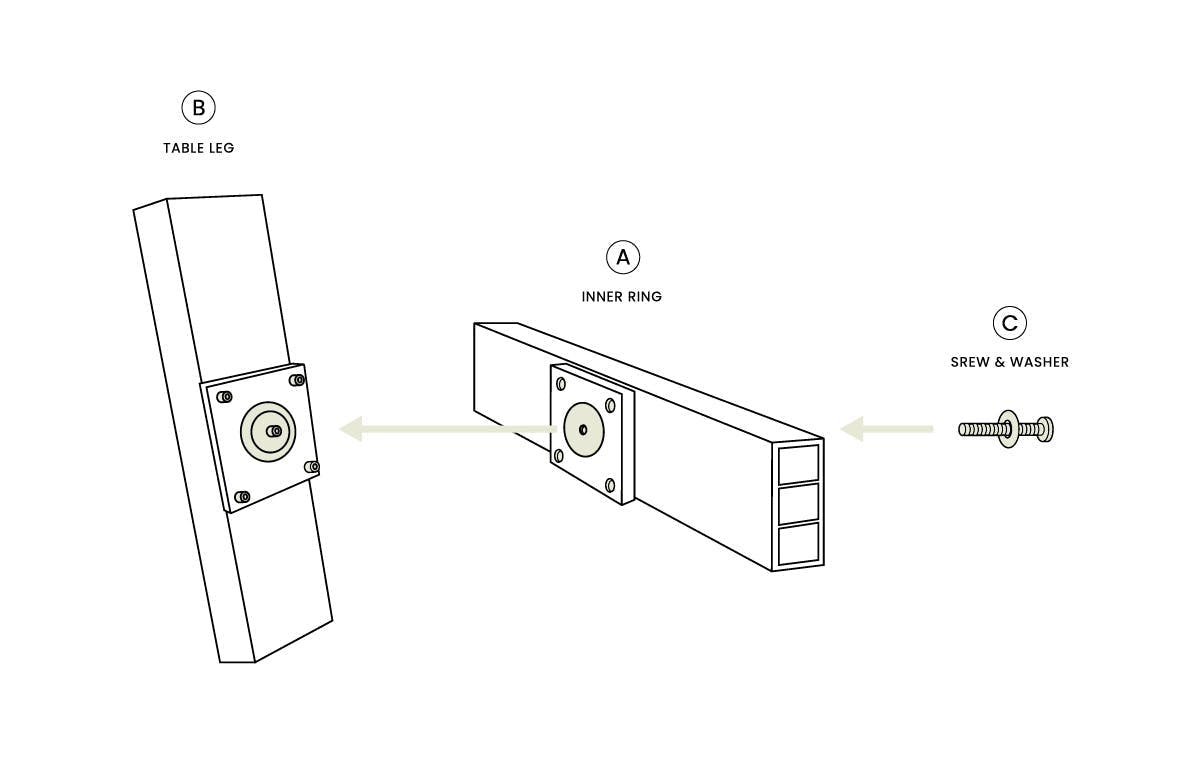
2. Locate inner ring assembly (A) and 1 of 4 leg assembly (B). Next, position welded clip on leg assembly into 1 of 4 welded clips located on inner ring assembly (A). See illustration below.
3. Now, obtain 1 of 4 screws (C) and insert 1 of 4 screws (C) through the inner ring assembly (A) and thread into the leg assembly (B) by hand until hand tight. Hand tightens only.
4. Using steps 2 thru 3 attach the other three legs to the inner ring forming the complete base unit. Legs should be assembled so that glides are matching top and bottom. Keep loose fit so that base can be attached to top.
5. Now, insert the base assembly on to top assembly (alternative top). Line up slotted leg holes at top of leg to top holes underside of top. Loosely connect base to alternative top using hardware provided with top.
6. Lastly tighten all bolts to complete unit.
Alternative Top (Knock-Down)

STEPS
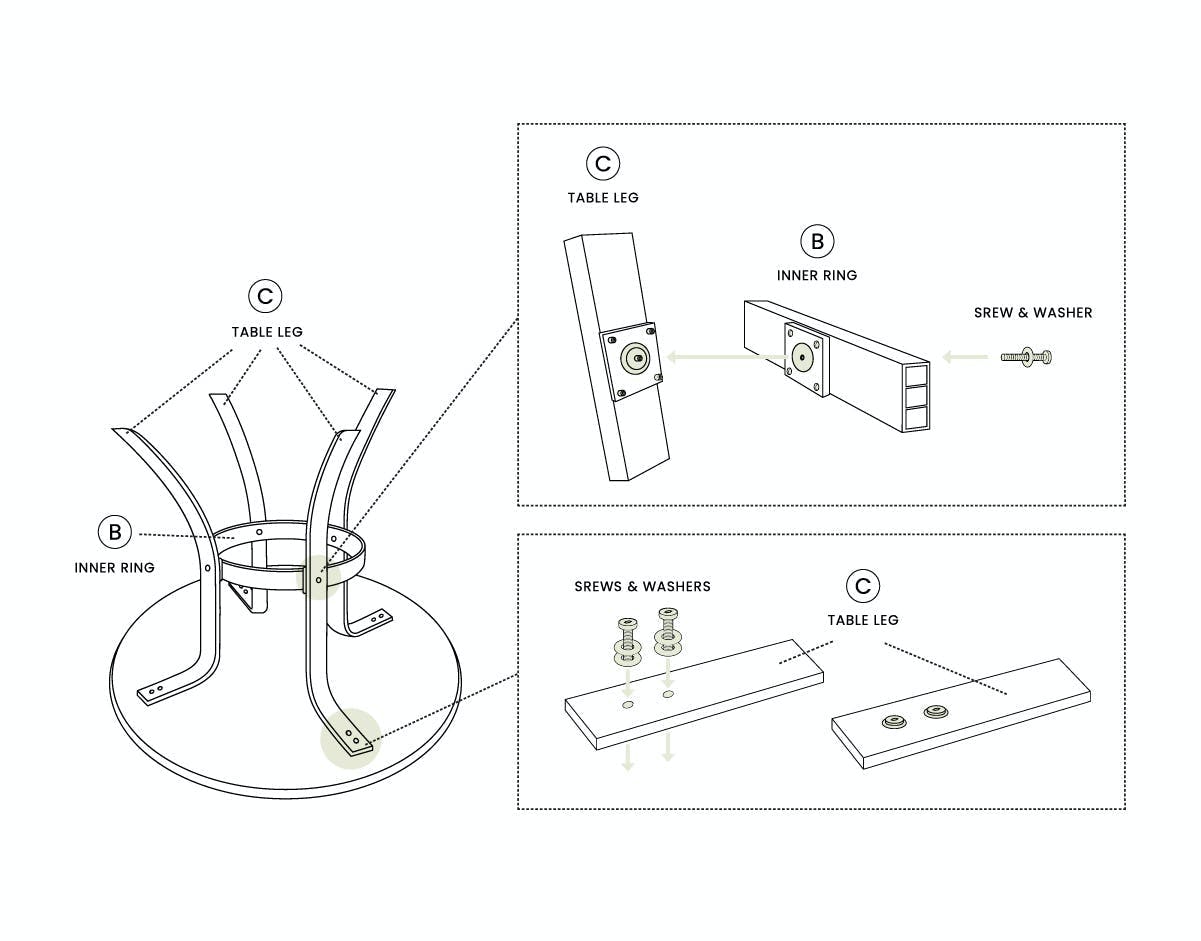
1. Slide plastic leg clip (A), over the table inner ring (B), inning up the plastic leg clip holes with the inner ring holes. The plastic leg clip is designed to fit snugly and uniformly to the inner ring.
2. Slide table leg (C) into plastic leg clip (A) inning up table leg holes with holes in both, the leg clip and inner ring. The plastic leg clip is designed to fit snugly and uniformly to the table leg.
Note: Certain table models have drain holes drilled into the inner ring (B). Be sure these holes point away from the table top.
3. Insert bolts through table leg, clip and inner ring and attach nuts loosely DO NOT TIGHTEN.
Note: Be sure looking square near head of bolts is completely seated into square hole of table leg to ensure enough bolt length for attachment of nuts.
4. Repeat step 1 thru 3 for remaining table legs – thus completing table base unit.
5. Lay table top upside down on cardboard or other non-scratching surface. Align pre-drilled holes on undersides of table top with holes at top of table base unit.
6. Insert hex head bolt (F) through table leg (C) into table top holes and tighten. Two bolts are used for each leg.
7. Repeat the step 6 for remaining table legs.
8. Tighten nuts attached in steps 3 and 4.
Texacraft, a leader in the outdoor commercial furniture market since 1975. Texacraft has been a trusted and reliable source of outdoor contract furniture solutions for thousands of customers from casinos and country clubs to multi-family housing, hotels and REITs.